
QuickBooks Online: Journal Entry
Simply put, a Journal Entry is a record of all accounting transactions made by the company and entered in a General Ledger. QuickBooks Online takes in these transactions automatically and inputs the collected data into the general ledger for them to be prepared into reports. Transactions like bills, checks, invoice, etc. will be posted as they are made.
Both credit and debit columns should always balance whenever you make a journal entry and while having an accounting software at your disposal doesn’t necessarily mean that you become a pro at managing your own books overnight, understanding the basics of QuickBooks will give you good insight on how to go about with keeping your accounts balanced and organized.
Not every transaction is automated
QuickBooks automates your transaction for you as they occur and the program will gather all this data into the general ledger. However, there will be times when you need to do things manually. Correcting an erroneous entry is one example. Keep in mind that every debit transaction must have an equivalent credit transaction to balance it out, and vice versa.
5 Steps to making a QuickBooks Online Journal Entry
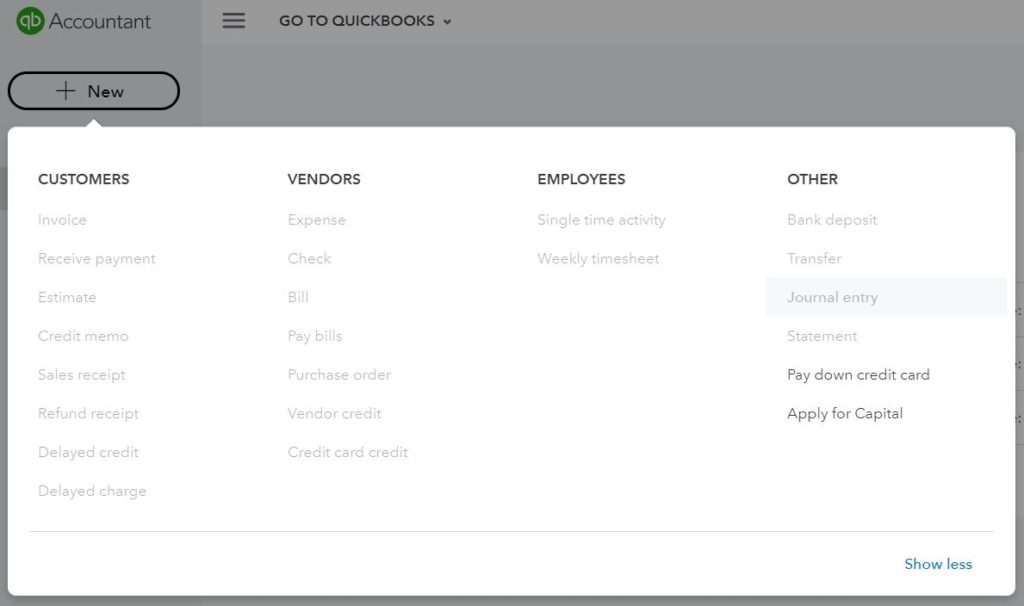
Step One: Navigate to the journal entry feature in QuickBooks Online
On the main page of QuickBooks Online, you will see that there is a + mark on the upper left side of the screen. Here is where you can create a journal entry under the ‘Other’ section. Clicking it will take you to the entry itself for you to fill in all the necessary information.
Step Two: Fill in the date and journal number
Next step is filling in the Journal number and date of the transaction. QuickBooks automatically sets the date as the current day but if you’re entering a transaction from a previous date, make sure to note it down here. Additionally, QuickBooks auto sets the Journal entries in sequence.
Step Three: Enter the correct accounts in the “Category” column
Identify which category your transaction falls under. This will make your entries organized and let you track what came in and what went out. Whenever you make a manual entry, there will always be two accounts involved: one that has money taken out from and another that has money put into.
Step Four: Enter the debit and credit amounts until the entry is balanced
Now that you’ve pulled up the right accounts, enter the amount in their respective columns. Make sure they balance out in the end as this will have a direct impact on your general ledger. It doesn’t matter how many lines of entries you put it as long as it balances out at the end.
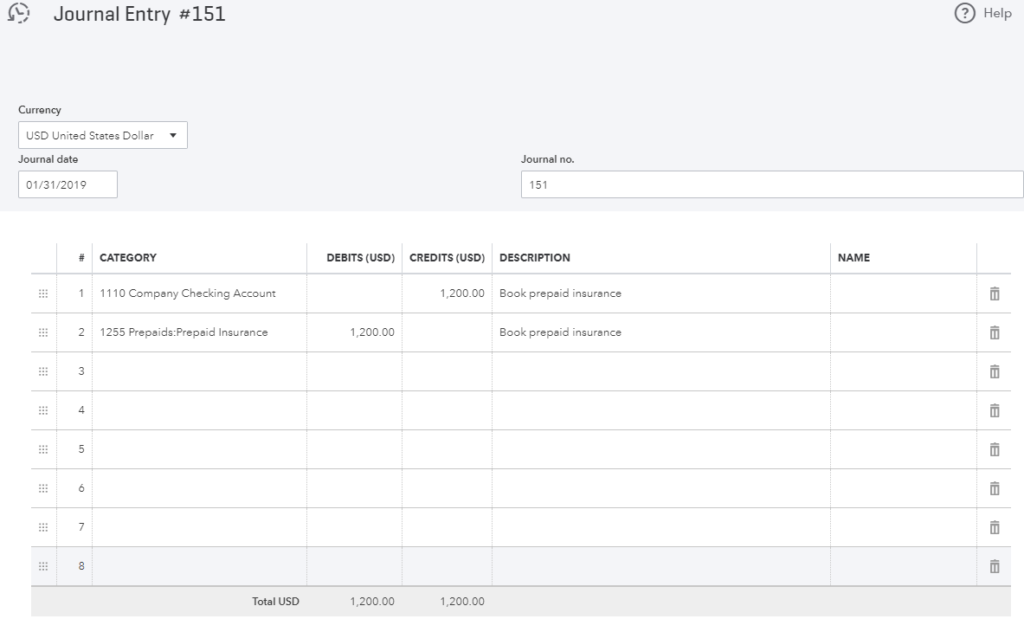
Step Five: Add a description and save
The last step is to add a description to your entry and this lets you know what that transaction was for and keeps things organized when the time comes for you to finalize your financial reports.
When you’ve got all the basics down, time and repetition will familiarize you even further when it comes to creating manual entries for your books. You don’t have to be a pro in order to do your own entries but having the knowledge to navigate your way around your accounting program will help out your business in the long run. If it still leaves you confused, you can always hire an accountant.
Silicon Harbor Business Services is based in Mount Pleasant, SC. We provide solid, practical advice to small business owners and select individuals. We work with Quickbooks Online, Quickbooks Desktop and Quickbooks Enterprise.
For a complete list of our services, please click here. Reach out to our team of Business Consultants at Silicon Harbor Business Services in Mount Pleasant, SC if you have any questions about online bookkeeping or business consultancy. We’d love to hear from you!
Resources: